Last month, I woke up to the sound of water dripping from my bathroom faucet at 2 AM. That rhythmic drip… drip… drip wasn’t just annoying—it was money literally going down the drain. After three days of ignoring it (and a noticeably higher water bill), I finally decided to tackle the repair myself. The problem? I had no idea what I was looking at when I opened up my Pegasus bathroom faucet. If you’ve found yourself staring at a confusing mess of metal parts, wondering which piece is causing your leak, you’re in exactly the right place.
The Pegasus 831-670 bath faucet is one of those fixtures that seem to appear in homes everywhere, yet nobody talks about how actually to fix them when they break. Whether you’re dealing with a persistent drip, low water pressure, or a handle that feels like it’s fighting back every time you turn it, understanding your faucet’s anatomy is the first step toward a successful repair. This guide walks you through the complete parts diagram, tells you exactly what each component does, and shares the kind of practical advice that comes from actually doing this work—not just reading about it.
Understanding Your Pegasus 831-670 Faucet Model
Before you start ordering parts or disassembling anything, make sure you’re working with the 831-670 model. I learned this the hard way when I ordered a replacement cartridge for what I thought was my faucet model, only to discover it was slightly too long and wouldn’t seat properly. That mistake cost me a week of waiting for the right part and an extra $15 in shipping fees.
Identifying Your Faucet Model Number
Finding your model number isn’t always straightforward. On most Pegasus bathroom faucets, the model number appears in one of three places: underneath the sink on a sticker attached to the supply lines, on the original installation manual (if you still have it buried in that drawer with all the other appliance booklets), or etched lightly on the faucet body itself—usually near the base where the spout meets the deck plate. The 831-670 specifically refers to a widespread bathroom faucet design, meaning the handles and spout are separate pieces mounted individually on your sink or countertop, typically with an 8-inch spread between the hot and cold handles.
If you can’t locate the model number, don’t panic. Take clear photos of your faucet from multiple angles and compare them to images online. The 831-670 has distinctive lever-style handles with a slightly curved, almost ergonomic design that feels substantial in your hand. The spout has a gentle arc that provides good clearance for washing hands or filling containers, and the overall aesthetic leans toward a transitional style—it works with both traditional and contemporary bathroom designs.
Common Features of the 831-670 Series
What makes the 831-670 worth repairing rather than replacing? For starters, these faucets were built during an era when Pegasus (a brand historically associated with Home Depot) actually used solid brass construction for many components. The valve bodies are typically brass, which resists corrosion far better than cheaper zinc alloys found in budget faucets today. The ceramic disc cartridges, when they were new, provided smooth operation and drip-free performance that could last a decade or more with proper care.
The widespread configuration means you’re dealing with three separate installation points: the left handle (hot water), the right handle (cold water), and the central spout. Each connects to your water supply lines independently, which actually makes repairs easier in some ways—you can work on one side without shutting off water to the entire bathroom. The handles operate with a quarter-turn motion to open or close fully, and the internal cartridges control both flow rate and temperature mixing at each handle.
Why This Model Remains Popular
Even though Pegasus has shifted its product lines over the years, the 831-670 remains common in homes built between roughly 2005 and 2015. It hit a sweet spot between affordability and quality, making it attractive to builders and homeowners alike. The brushed nickel and chrome finishes were particularly popular, and when properly maintained, they hold up remarkably well to daily use and cleaning chemicals. Rather than replacing an otherwise functional faucet because of a single failed component, repairing it makes economic and environmental sense—and that’s exactly what this guide helps you accomplish.
Complete Parts Diagram Breakdown
When you look at an exploded parts diagram for the 831-670, it resembles a mechanical puzzle with about fifteen distinct components. Understanding what each piece does helps you diagnose problems accurately and ensures you order the correct replacement parts the first time. Let me walk you through the major assemblies from top to bottom.
Handle Assembly Components
Starting with what you see and touch daily, the handle assembly consists of several interconnected parts. The handle lever is the visible portion—usually made of zinc or brass with a plated finish that matches your faucet. Beneath that sits the handle hub, a cylindrical piece that connects the lever to the internal mechanisms. The index button (the small colored disc indicating hot or cold) pops into the top of most handles and can be pried off with a small flathead screwdriver to access the set screw underneath.
That set screw is crucial—it’s what holds the entire handle assembly onto the cartridge stem. When you turn your handle, you’re actually rotating this stem, which extends down into the valve body. The escutcheon plate (also called a deck plate or trim ring) sits between the handle and the sink surface, covering the installation hole and providing a clean, finished look. Don’t overlook the escutcheon gasket beneath this plate; if it deteriorates, water can seep beneath and damage your countertop or vanity.
Cartridge and Valve System
The heart of your faucet’s operation lies in the ceramic disc cartridge. This cylindrical component, typically about two inches long with a square or hexagonal broach at the top, controls water flow through two polished ceramic discs that slide against each other. When aligned, water flows; when rotated, they block the water path. The 831-670 usually takes a specific cartridge type—often cross-compatible with certain Glacier Bay and CFG models —which is helpful, since Pegasus-branded parts can be harder to source now.
Inside the valve body (the brass housing that mounts under your sink), you’ll find seat and spring assemblies at the base where the cartridge sits. These small but mighty components create the seal that prevents water from leaking when the faucet is off. The springs provide tension, while the seats (small rubber or neoprene washers) form the actual watertight barrier. Over time, mineral deposits and friction wear down these parts, causing the dreaded drip.
The retaining nut or collar holds the cartridge firmly in the valve body. Some versions require a special spanner wrench to loosen, while others can be removed with adjustable pliers. Be careful here—over-tightening during reassembly can crack the ceramic discs in your new cartridge, rendering it immediately useless.
Spout and Aerator Parts
The spout assembly on the 831-670 features a riser that connects to the valve body below and terminates in the spout head where water exits. Inside the spout, a diverter (if your model includes a side spray or similar feature) directs water flow, though basic models may not have this component. The connection between the spout and valve body typically uses O-rings to create a seal while allowing the spout to swivel if designed to do so.
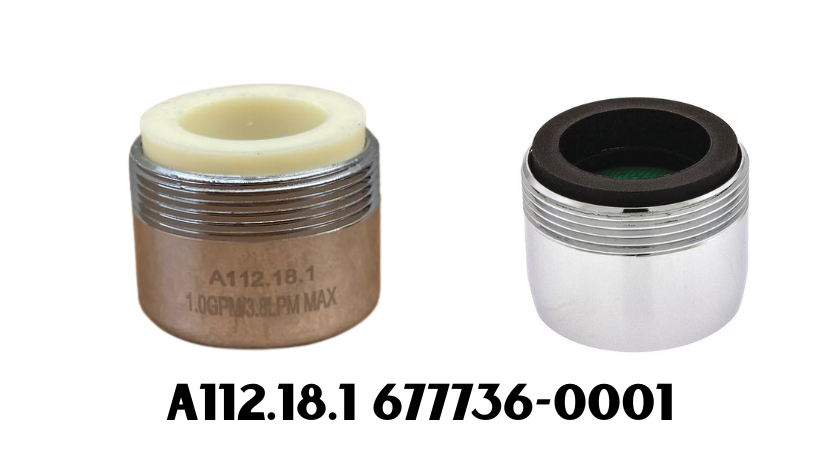
At the very tip sits the aerator, that small screen assembly that mixes air with water to prevent splashing and reduce water usage. Aerators unscrew counter-clockwise (though some require a special key tool) and contain multiple tiny parts: the housing, screen, flow restrictor, and gasket. If your water pressure seems low but the problem isn’t in the handles, a clogged aerator is often the culprit—mineral buildup from hard water gradually restricts flow through the fine mesh screen.
Drain Assembly Components
While not technically part of the faucet itself, the 831-670 typically came as a complete set, including a matching pop-up drain assembly. This system includes the drain flange (the visible piece in your sink basin), the tailpiece extending down to the P-trap, the lift rod that runs behind the spout, and the linkage assembly that connects the rod to the stopper mechanism. The clevis strap, spring clip, and pivot rod work together to raise and lower the stopper when you pull or push the lift rod.
These drain parts experience different stresses than the faucet components—hair, soap scum, and toothpaste can create clogs and corrosion issues distinct from those caused by water pressure and mineral deposits affecting the faucet itself. However, since they share the same finish and design language, keeping the drain assembly in place during your faucet repair keeps your bathroom looking cohesive.
Mounting Hardware Kit
Underneath the sink, where most homeowners rarely look, the mounting hardware secures everything to your countertop or sink deck. This includes locknuts or mounting nuts that thread onto the valve bodies, washers that distribute pressure and prevent scratching, and supply line connections that link your faucet to the home’s hot and cold water pipes. The 831-670 typically uses flexible braided stainless-steel supply lines with 3/8-inch compression fittings, though older installations might use rigid copper tube connections.
Don’t forget to putty or silicone-seal the installation. While not a “part” per se, proper sealing prevents water from seeping under the faucet bases and causing damage to your vanity or countertop substrate. If you’re removing your faucet for repair, you’ll likely need to clean off old putty and apply fresh sealant during reassembly.
Where to Source Replacement Parts
Here’s where things get interesting—and potentially frustrating if you don’t know where to look. Pegasus, as a distinct brand, has largely been absorbed or discontinued, with many of its product lines transitioning to Glacier Bay or other house brands. However, the 831-670 was so widely distributed that parts remain available through multiple channels if you know where to search.
OEM vs. Aftermarket Options
Original Equipment Manufacturer (OEM) parts are those manufactured to Pegasus’s original specifications, often by the same factories that produce components for new faucets. These guarantee a perfect fit and function but command higher prices and may have longer shipping times. Companies like Faucet Parts Plus and Chicago Faucet Shoppe specialize in OEM Pegasus components and maintain databases where you can search by model number.
.
Aftermarket parts offer a budget-friendly alternative. Generic ceramic cartridges, universal O-ring kits, and compatible handles can often be substituted for OEM parts at significant savings. The key is matching specifications, not brand names. For example, the cartridge in your 831-670 might be dimensionally identical to a Glacier Bay or CFG cartridge available at your local Home Depot for half the price of a Pegasus-labeled version
. The critical measurements are overall length, stem broach shape (the connection to your handle), and the base diameter where it seats in the valve body.
Online Retailers and Pricing
My personal experience has been that online specialty retailers often provide better service than big-box stores when it comes to hard-to-find parts. Websites like Grigg Industries maintain organized catalogs of Pegasus components with photos that help you visually confirm you’re ordering the right piece
. Expect to pay between $15 and $35 for a quality replacement cartridge, $5 to $12 for seat-and-spring kits, and $8 to $20 for handle assemblies, depending on finish and whether you need both handles.
Amazon and eBay can be hit-or-miss. While prices are often lower, verify seller ratings and return policies carefully. I’ve received “universal” parts that required modification to fit, and counterfeit components that failed within months. If the price seems too good to be true—like a $4 cartridge when others sell for $25—proceed with caution.
Local Hardware Store Alternatives
Don’t overlook your local plumbing supply house. These businesses often have relationships with parts distributors that aren’t available to the general public online. Bring your old part (or detailed photos and measurements) and speak with the counter staff. In my experience, the older guys who have been in the business for decades can often identify a part by sight and may have compatible alternatives in stock that aren’t labeled for Pegasus specifically.
Home Depot and Lowe’s occasionally stock compatible Glacier Bay parts that fit Pegasus faucets, since the same manufacturers produced both brands
. The key is bringing your old component to compare in person rather than trusting the compatibility charts, which aren’t always updated for discontinued models.
Step-by-Step Repair Instructions
Theory is helpful, but eventually you need to get your hands dirty. This section covers the most common repair scenario: replacing a leaking cartridge and worn seat/springs. I’ve performed this repair on three different 831-670 faucets over the years, and while each presented its own quirks, the fundamental process remains consistent.
Tools You’ll Need
Gather these before you start: adjustable wrench set, Phillips and flathead screwdrivers, flashlight or headlamp (under-sink lighting is never adequate), small bowl or bucket for water drainage, old towels, penetrating oil (like WD-40), plumber’s grease, and possibly a cartridge puller tool if your old cartridge is stubborn. Wear safety glasses—mineral deposits and debris can fly when you’re working in tight spaces, and the last thing you want is calcium buildup in your eye.
Turn off the water supply to your faucet before beginning. The shutoff valves are usually directly below the sink, one for hot and one for cold. Turn them clockwise until firm resistance is reached—don’t force them if they’re stuck, as old valves can break. If your shutoffs haven’t been operated in years, spray them with penetrating oil an hour before starting. In a worst-case scenario, you may need to shut off the main water supply to your home.
Removing the Old Cartridge
Start with the handle. Pry off the index button with a small flathead screwdriver to expose the set screw. Loosen this screw (it usually doesn’t remove completely—just backs out far enough to release the handle) and pull the handle straight up and off. If it’s stuck due to mineral buildup, wiggle it gently side to side—never hammer on it, as you can damage the underlying stem.
Remove the escutcheon plate by unscrewing the retaining nut or collar beneath it. This exposes the cartridge stem. Take a photo now for reference—you’ll want to remember the orientation. Look for a clip or retaining pin that holds the cartridge in place; some models have a brass horseshoe clip that pulls straight out with pliers. Others use a threaded collar that unscrews counter-clockwise.
Here’s where it gets tricky. The cartridge should pull straight out, but years of mineral deposits often cement it in place. Grip the stem with pliers and pull firmly while twisting back and forth. If it won’t budge, apply penetrating oil around the base and wait 15 minutes. For truly stubborn cartridges, a specialized cartridge puller tool applies even pressure without damaging the valve body. Never use excessive force that could crack the brass housing—that turns a $30 repair into a $300 faucet replacement.
Once removed, inspect the valve body interior. The seat and springs at the bottom should be visible—use a seat wrench or needle-nose pliers to extract them. Note which direction the seat faces (usually cup-side toward the water source) and replace both seats and springs as a set, even if only one side was leaking. They’re inexpensive, and installing mismatched wear patterns results in uneven sealing.
Installing New Components
Clean the valve body thoroughly with a small brush and white vinegar to dissolve mineral deposits. Rinse with clean water and dry with a rag. Apply plumber’s grease (never petroleum-based, which degrades rubber components) to the new O-rings on your replacement cartridge and the new seat threads.
Install new seats and springs using your fingers or the seat wrench—finger-tight plus a quarter turn is sufficient. Insert the new cartridge, ensuring it’s oriented the same way as the old one (the handle connection should face the appropriate direction for your handle to mount correctly). Replace the retaining clip or tighten the collar firmly but not excessively—over-tightening cracks ceramic discs.
Reattach the escutcheon plate, then the handle. Turn the water supply back on slowly, checking for leaks around the cartridge base. Test both hot and cold operation, running water for two minutes to flush any debris. Check again for leaks after 24 hours of normal use, as some leaks only appear under pressure cycles.
Testing for Leaks
Leaks reveal themselves in three ways: immediate dripping from the spout (cartridge not sealing), water around the handle base (O-ring or cartridge seal issue), or water under the sink (supply line or valve body connection). For spout leaks, ensure the cartridge is fully seated, and the retaining hardware is tight. Handling leaks usually indicates a twisted or damaged O-ring—disassemble and reinstall carefully. Under-sink leaks require tightening connections or replacing supply line washers.
Troubleshooting Common Issues
Not every faucet problem requires complete disassembly. Sometimes simple diagnostics save hours of unnecessary work.
Low Water Pressure Solutions
If water flow seems weak but the faucet doesn’t leak, start with the easiest fix first. Unscrew the aerator and clean the screen—soak it in white vinegar for an hour if mineral buildup is visible. While the aerator is off, test the flow; if pressure returns to normal, you’ve found your culprit. If pressure remains low, the issue is upstream—possibly in the supply lines or shutoff valves.
Check the shutoff valves under the sink. Old gate valves (the round wheel-type) sometimes fail to open fully or have debris blocking the opening. Ball valves (the lever-type) are more reliable but can still accumulate sediment. Fully close them, then fully open them, and test again. If only hot OR cold has low pressure, the problem is isolated to that side’s cartridge or supply line.
Dripping Faucet Fixes
The classic drip-drip-drip usually indicates worn seats and springs or a failing cartridge. Here’s a diagnostic trick: turn off the shutoff valves one at a time. If closing the hot valve stops the drip, the hot side needs attention. If closing either valve stops it, the spout itself or a crossover issue in the cartridge is likely the cause.
Rapid dripping (several drops per second) typically means catastrophic seal failure—replace the cartridge immediately to prevent water waste. Slow dripping (one drop every few seconds) might be resolved with just new seats and springs, which is a cheaper repair. If dripping persists after replacing both cartridge and seats, inspect the valve body for cracks or corrosion pitting that prevents sealing. Unfortunately, damaged valve bodies usually mean faucet replacement.
Handle Stiffness Repair
Difficulty turning the handle indicates mineral buildup in the cartridge or handle mechanism. Remove the handle and apply penetrating oil to the stem, working the mechanism back and forth. If this doesn’t restore smooth operation, the ceramic discs inside the cartridge have likely ground against each other due to hard water abrasion—replacement is the only solution.
Sometimes the problem is simpler: the set screw is over-tightened, or the handle hub is binding against the escutcheon. Loosen the mounting hardware slightly and test the operation. If smoothness returns, you’ve found an installation issue rather than a component failure.
Maintenance Tips for Longevity
Prevention beats repair every time. After spending a Saturday fixing a faucet, you’ll appreciate these simple maintenance habits that extend the life of components.
Clean your aerator every six months by unscrewing it and rinsing the screen. This prevents pressure buildup that can strain cartridges and reduce wear on internal seals. If you have hard water, soak the aerator in vinegar quarterly to dissolve mineral deposits before they become problematic.
Exercise your shutoff valves twice yearly—turn them off and on to prevent the rubber washers from bonding to the valve seat and becoming impossible to operate in an emergency. This takes thirty seconds and can save you from flooding damage if a supply line bursts.
Wipe down your faucet finish weekly with a soft cloth and mild soap. Avoid abrasive cleaners or scrub pads that damage the protective clear coat on brushed nickel or chrome finishes. Once the clear coat fails, the underlying metal tarnishes rapidly and becomes impossible to restore to its original appearance.
Finally, address drips immediately. A faucet that drips once per second wastes over 3,000 gallons per year—enough to take 180 showers. Beyond the environmental impact, the constant water flow accelerates component wear, turning a simple washer replacement into a complete cartridge rebuild.
Frequently Asked Questions
How do I know if my Pegasus faucet is model 831-670? Check for a sticker or etching on the valve body beneath the sink, or compare your faucet’s appearance to photos online. The 831-670 features widespread installation, lever handles, and a curved spout, typically sold between 2005 and 2015.
Are Pegasus and Glacier Bay faucet parts interchangeable? Often, yes. Many Pegasus faucets were manufactured by the same companies producing Glacier Bay products for Home Depot. Compare cartridge dimensions and broach shapes rather than relying solely on brand names.
Why is my new cartridge still leaking after installation? Most commonly, the cartridge isn’t fully seated, the retaining clip isn’t properly installed, or the valve body seats weren’t replaced. Remove and reinstall, ensuring the cartridge pushes completely into the valve body until it bottoms out.
Can I repair my faucet if the valve body is cracked? Unfortunately, no. Cracked valve bodies cannot be reliably sealed and require complete faucet replacement. Inspect carefully before ordering parts—cracks usually appear as hairline fractures in the brass or visible water seepage from the casting itself.
Where can I find an official parts diagram? While Pegasus no longer maintains an active website for discontinued models, retailers like Faucet Parts Plus and Chicago Faucet Shoppe maintain diagram archives. Search their databases using your model number, or contact their customer service with photos for assistance with identification.
How long should a ceramic cartridge last? With normal use and moderate water hardness, expect 10 to 15 years of service. Hard water with high mineral content reduces lifespan to 5 to 8 years, while water softeners can extend it beyond 15 years.
Conclusion
Repairing your own faucet isn’t just about saving money on a plumber’s service call—though that’s certainly a nice benefit. It’s about understanding how your home’s systems work, gaining the confidence to tackle bigger projects, and keeping functional equipment out of landfills. The Pegasus 831-670 bath faucet represents a generation of fixtures built to last, and with the right parts and knowledge, there’s no reason it can’t serve your household for another decade.
Remember that every repair teaches you something. My first faucet repair took three hours and involved two trips to the hardware store. My most recent one took forty-five minutes start to finish. The difference wasn’t better tools or smarter parts—it was simply knowing what to expect and having a clear mental picture of how all those components fit together. That’s exactly what this guide provides: the mental blueprint you need to approach your repair with confidence.
Whether you’re dealing with a minor drip or preparing for a complete rebuild, take your time, double-check your parts compatibility, and don’t hesitate to ask questions at your local plumbing supply house. The professionals there want you to succeed because successful DIY repairs mean fewer emergency service calls for them and more satisfied customers spreading the Word. Your 831-670 faucet has years of life left—now you have the knowledge to keep it flowing smoothly.